Chapter 3 Fuel, emission control and exhaust

1 - General

2 - Hot Start Problem Fix

7 - Fuel Delivery/Fuel Pumps

35 - Oxygen sensor

37 - Oxygen sensor control unit

38 - Frequency valve

67 - Exhaust system

72 - Mods and Carbs

1 - General

General Description and pictures of Australian and Euro Spec cars at Darrin's website

Dave Chamberlin found this site: http://www.vectorbd.com/peugeot/bosch.html . It is about the wrong kind of car, but is a good description of the K-Tronic injection. There is also a bunch of links to good fuel injection information from that site.

A tool is available to pull the injectors out of the head without damaging the lines. This tool is fitted around the injector, and a screwdriver is put through the slots in the tool and used to lever the injector up and out of the head:


2 - Hot Start Problem Fix

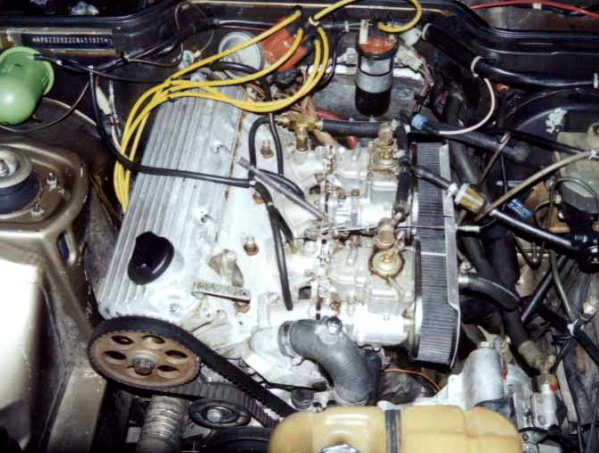
A very common problem on 924's is the "hot-start problem." This is where the car will start very nicely when cold, runs properly, and is properly tuned, but will not start without a great deal of cranking when warm, if it has been let sit for more than 15 minutes or so after shutdown. This problem is usually caused by, for one reason or another, not maintaining the high fuel pressure in the engine compartment. Most commonly this is caused by injectors leaking after engine shutdown (they should close shut below a certain minimum pressure) or fuel draining back into the tank - the fuel accumulators and a check valve in the fuel pump (in some cases) should prevent this occurrence. If you are experiencing hot-start problems (as opposed to general starting problems, hot or cold), and the car is properly tuned and in good running order (no vacuum leaks, etc.), then check the injectors and fuel accumulators.

David Russell has provided a very good write-up of how to wire the cold-start valve (usually used on cold starts only) to be actuated manually to help overcome this problem. Hot Start Problem Fix

7 - Fuel Delivery/Fuel Pumps

Fuel Delivery Problems

From: Michael J. Brown
Email: 924martiirossi@email.msn.com
Date: 20 Apr 2000
Time: 21:02:26

Comments

I too was guilty of seeking a "quick fix" to my 924's cold start/warm start/no start/running, problems. I then bought two excellent books on the Bosch Fuel Injection Systems and became a student. I done a step-by-step test of the fuel system and replaced any defective parts. My car now starts and stays running under all conditions.

The advantage of this approach is: 1. You will learn the inner working of your car. 2. Avoid the costly repair bills 3. Realize that Bosch has a very well engineered system.

The MJB

Michael J. Brown 924 Martini Rossi 80 931 81 924 (All great cars!)

Fuel Pumps - Testing

Fuel pumps can get hot before they die. Porsche recommends using Chevron fuel injector cleaner with Techron as a preventative maintenance on the fuel system; this will help keep the fuel injection components from clogging up, and keep them lubricated. This covers from the fuel pump to the injectors and everything in between. The biggest enemy of the CIS system is dirt, which can jam in the tight clearances, followed by water, which can cause rust that will jam the clearances. This should be done at least every 15kmi.

For this reason, it is a very good idea, when restoring a car that has sat for a while, to drain the fuel tank, flush with new clean fuel, and fill with fresh fuel (after the flush runs clean) and Techron, before even attempting to start the car. Of course, if you're reading this, chances are you've already sat behind the wheel for a few hours trying to get the car to start without luck! Likewise, a fresh fuel filter is a very good idea. However, make sure the fuel is clean first - nothing sucks more than replacing a new fuel filter that has become clogged with old junk! Porsche's service interval on the fuel filter is 30kmi.

Finally, down to the tests you can run, to check if your fuel pump is OK, dead, or about to die.

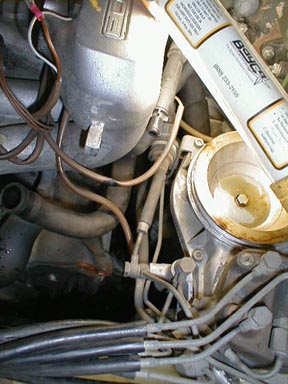
The first test is to check that fuel is being delivered to the engine compartment at an appropriate rate. According to the factory service manual, fuel delivery rate should be at least 750cc in 30 seconds of fuel pump on time (turn on ignition and power the fuel pump), as delivered in the engine compartment. To accomplish this test, clamp the return line at the tank, disconnect it at the fuel distributor, and let it flow out of the return line into a measuring container. If it flows less than 750cc, the pump may need to be replaced.

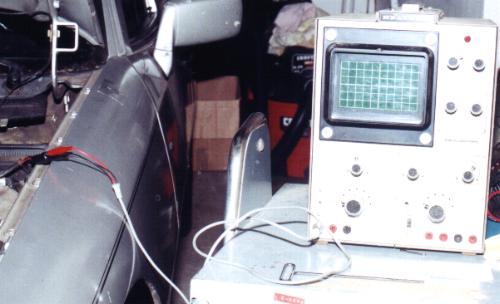
The next step is to check the current consumption when running. With an ammeter (which will measure the current drawn by the pump), the pump should use no more than 8.5Amps. If it's higher than that, your pump is likely on its way out.

Another consideration is to make sure that the screen on the fuel pickup (inside the tank) is clean and clear. This can only be accessed by draining the tank and going inside, unless the car has an in-tank fuel pump (though the tank will still have to be drained, of course). It should be gently cleaned with fresh fuel and a soft toothbrush - make sure to not push any debris into the pickup where it can be sucked into the main fuel pump and damage that expensive pump. There is also an external filter or noise baffle between the tank and pump, part #477 209 233 (VDO part #09 292 585), which may get clogged and need to be cleaned or replaced.

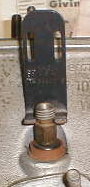
Finally, how to determine if your car has one or two pumps. All cars have a high-pressure pump external to the tank, clamped to the body behind the right rear wheel. As of sometime in '79, an in-tank supply pump was added. However, not all '79 cars have one. The surest way to figure out if you have 2 pumps is to slide under the car and look. If the car has an in-tank pump, the outlet from the fuel tank which goes to the external pump will have 2 electrical connections and a huge hex on it, and is actually the fuel pump. Single pump cars only have a nipple brazed into the tank wall, no electrical connections.

One more final note, this about buying replacement pumps. Pierburg, a subsidiary of Hella, makes replacement fuel pumps. The most commonly used external fuel pump on the 924 is 911.608.102.00, also used on the 77-80 911. The Pierburg replacement pump costs less new than the rebuilt Bosch pumps. It works extremely well. It also has some technical improvements over the OEM Bosch unit - it's quieter running, and uses plastic roller pump elements instead of metal, so they a) won't rust, and b) are far more tolerant of dirt than metal (since the plastic can "give" instead of jam tight like metal). For this reason, look into getting the Pierburg pump instead of the Bosch replacement. If your local parts vendor does not carry Pierburg pumps, contact All European (http://www.alleuro.com) to order one. The Pierburg part number (updated) is 98154.

Updating early fuel pumps (early '77 924):

There's one more advantage to this particular fuel pump. The early '77 cars used a smaller pump. This pump, part number 810.906.091.B is very hard to come by, and can cost up to about USD$400.The Bosch replacement pumps are not interchangeable, forcing owners of the early cars to buy the expensive pump. The Pierburg pump, however, has fittings such that it can in fact be swapped in to replace the early pump. The only slightly difficult part is that the electrical connections are different, and must be changed. However, the Pierburg pump comes with the required electrical connectors and rubber protective boots (to seal against weather), so this is a minor job. Just make sure to keep the connections straight (positive to positive) and use heat-shrink tubing if you splice wires, and the pump can be upgraded easily.

35 Oxygen sensor

Powerforsensor.JPG (34937 bytes)Installing an oxygen sensor into a car with headers places the sensor several feet farther away from the exhaust heat than the original single wire sensor. Using a 3-wire heated sensor I tapped into the fuel pump power lead at the main connector next to the ignition coil. This provides power to the sensor that is both fused and switched. (In fact, like the fuel pump, it is powered only when the fuel pump relay is closed.)

37 - Oxygen sensor control unit

The control unit test leads come from the main wiring bundle next to the vacuum booster.

pulsetestconnector.JPG (12683 bytes) Porsche probably had a purpose built tool which plugged into and was powered by the test connector. It was probably a dwell meter calibrated in duty cycle. Red is unswitched +12, brown ground, black signal.


Oscopeconnection.JPG (24456 bytes)Not having access to a special Porsche tool I hooked up the handy dandy $20 ocilloscope. You can buy these all day long for $20 or less at electronic salvage, 'Ham Fests'. In this application I just wanted to see the square wave form coming from the lamda control unit to confirm that it was functioning and changing the duty cycle to the frequency valve when the throttle micro switches operated.

38 Frequency valve

The frequency valve is at the top of the picture (towards the rear of the car) between the mixture control unit and the manifold. Towards the bottom (car front) is the control pressure reduction solenoid.  frequencyvalve82.jpg (30656 bytes)

The control pressure reduction valve is controlled by a temperature switch in the cooling system. Normally hard to see here is a picture taken with the head removed. On the left and right are electric temperature switches and in the center a vacuum switch. The specific parts are year dependent. On this car the left switch controls the lambda control unit and the right switch controls the pressure reduction valve. The vacuum controls the evaporative recovery system. The control pressure reduction is not a 'chatter' valve to modulate pressure as is the frequency valve. It is either open or closed.

hardtosee.jpg (46929 bytes)

67 Exhaust system

headers924.jpg (16675 bytes)
Headers as installed on several of the 924s in the Potomac Region. Make is MSDS. These have just had a fitting installed at the collector to fit the Oxygen Sensor. Any power gains are unknown and expected to be minimal to none. But they are cheaper than a new stock manifold!

Each of this type here had some interference with the inside edge of the right a-arm. The 1 and 2 tubes were bent in about 1/2 inch to cure. If that creates problems with oil filter clearance use a shorter filter.

72 - Mods and Carbs

Webers

Speaking of mods. You can install Webers, and here is a look of Vince's nice setup with 2 Weber 45 DCOE.

PonzWeber.JPG (23518 bytes)

This info is from a WeberCarb Book:
Conversion kit number K294, 924 2 liter
Carbs (2) of 40 DCOE 18
Main Venturi 32 Aux Venturi 4.5
Main Jet 115 Emulsion tube F11
Air correction 180 Idle Jets 45FG
ACC. Pump Jet 50 Pump Ex. Valve 55

The Jobes also have a nice Weber installation, and the one on the right is Jay Schreffler's install:

webersjobe.jpg (39035 bytes)weberjobe1.jpg (77939 bytes)Jay's carbs

Injection System Mods/Upgrades

According to the Blue Bible of Bosch FI (Bosch Fuel Injection, by Charles Probst, SAE), the K-Jetronic has been shown, by experience, to be capable of handling without major modification nearly double the output of the stock engine in most of it's factory applications, including the 924. It is a very solid and reliable system, when the components are in working order, and will stay in tune with a regularity that amazes those used to working with old carbureted cars. It truly was an advancement, for its day. It was even used on the 924 Carrera GTS, a street-legal stripped-down monster capable of some amazing performance, though in that case a fuel distributor from an early 928 was used, to provide the additional fuel delivery, being plumbed from 8 output lines back into the 4 injectors in the intake.

That being said, state-of-the-art was 20-some years ago! Many advancements have been made in engine management since then, both in what is available to the vehicle manufacturers and to the private tinkerer...

David Ewing is working on some modernization to his car using the Electromotive system. "I am satisfied the TECII is the way to go.  Several people have said the HALTech is cheaper and more flexible but every application I have noticed in Excellence uses TECII.  Fred at Electromotive has been very helpful with injector choices and so on."

Electromotive recommends an injector capable of providing enough fuel to produce 60 hp/cylinder, 35 lb/hr.  The injectors are from a 72-75, Mercedes 450 SL, and are blue in color, I found 4 at a bone yard for $15.00/ea.  The injector has a hose barb end and is only .002" larger outer diameter than the phenolic insert used to secure the CIS injector.  The only hitch is getting the threads machined out of the head, building a fuel rail, plumbing and devising a means to hold down the injector.    After .002" is removed from the interior side wall of the injector port the injector will slip in quite nicely.  The injector will fit into the space the phenolic spacer had previously occupied. We might even be able to tap the injectors and screw them into the head.

  Mvc-001s.jpg (3922 bytes)Mvc-002s.jpg (3330 bytes)


One other improvement discussed by Probst in his book is the possibility of adding load-sensitive enrichment to the stock CIS system. The load sensitivity is such that, as manifold vacuum decreases, the mixture is enriched. The best and simplest way to do this is to replace the stock Control Pressure Regulator, or Warm-Up Regulator, with one that is vacuum-sensing. Bosch supplied these to various automakers, including Audi and Porsche, for higher-end cars. The basic function of this part is to enrich the mixture during warm-up; naturally it can also be made to do this as a function of a vacuum signal. However, the modification cannot be performed on a stock 924 unit, with any reasonable amount of work, so it is easier to swap in a load-sensing unit. For more details on the theory behind K-Jetronic, consult Probst's book.

The load-sensitive warm-up regulator should be found in the Audi 2V 5 cylinder motor. According to Dave Jalali, that should be the 86 & 87 Audi 5000TQ & 5000CS models and also the early 88-90 200TQ & 200CS models. In the event that there are two vacuum nipples on the new unit, the one in the base should be connected to a vacuum line from the intake manifold, as this is the one that will provide the load-sensitive enrichment.

This modification is especially useful on 931's and other turbo cars using K-Jetronic, as it will progress into boost-sensitive enrichment without any special modification, and without the installation of any electronics! It may be advisable to include a small valve in the vacuum/boost line between the intake and the regulator, to allow adjustment of the enrichment rate (just like pinching the line to the wastegate) to tune the response of the unit. If this is done, make sure to use a high-quality valve, such as a Clippard valve, to avoid failures.